Setup#
Create a repo to handle access requests automatically.
- 1
Create an access requests repo
Create a fully empty repository with any name you choose. This must be a publicly accessible repo. It does not need any content. This is where customers can create issues using our auto-generated templates to request access to your private repos. Entora will automatically handle the rest.
See example: playground-access-requests-repo-prod (example customer experience)
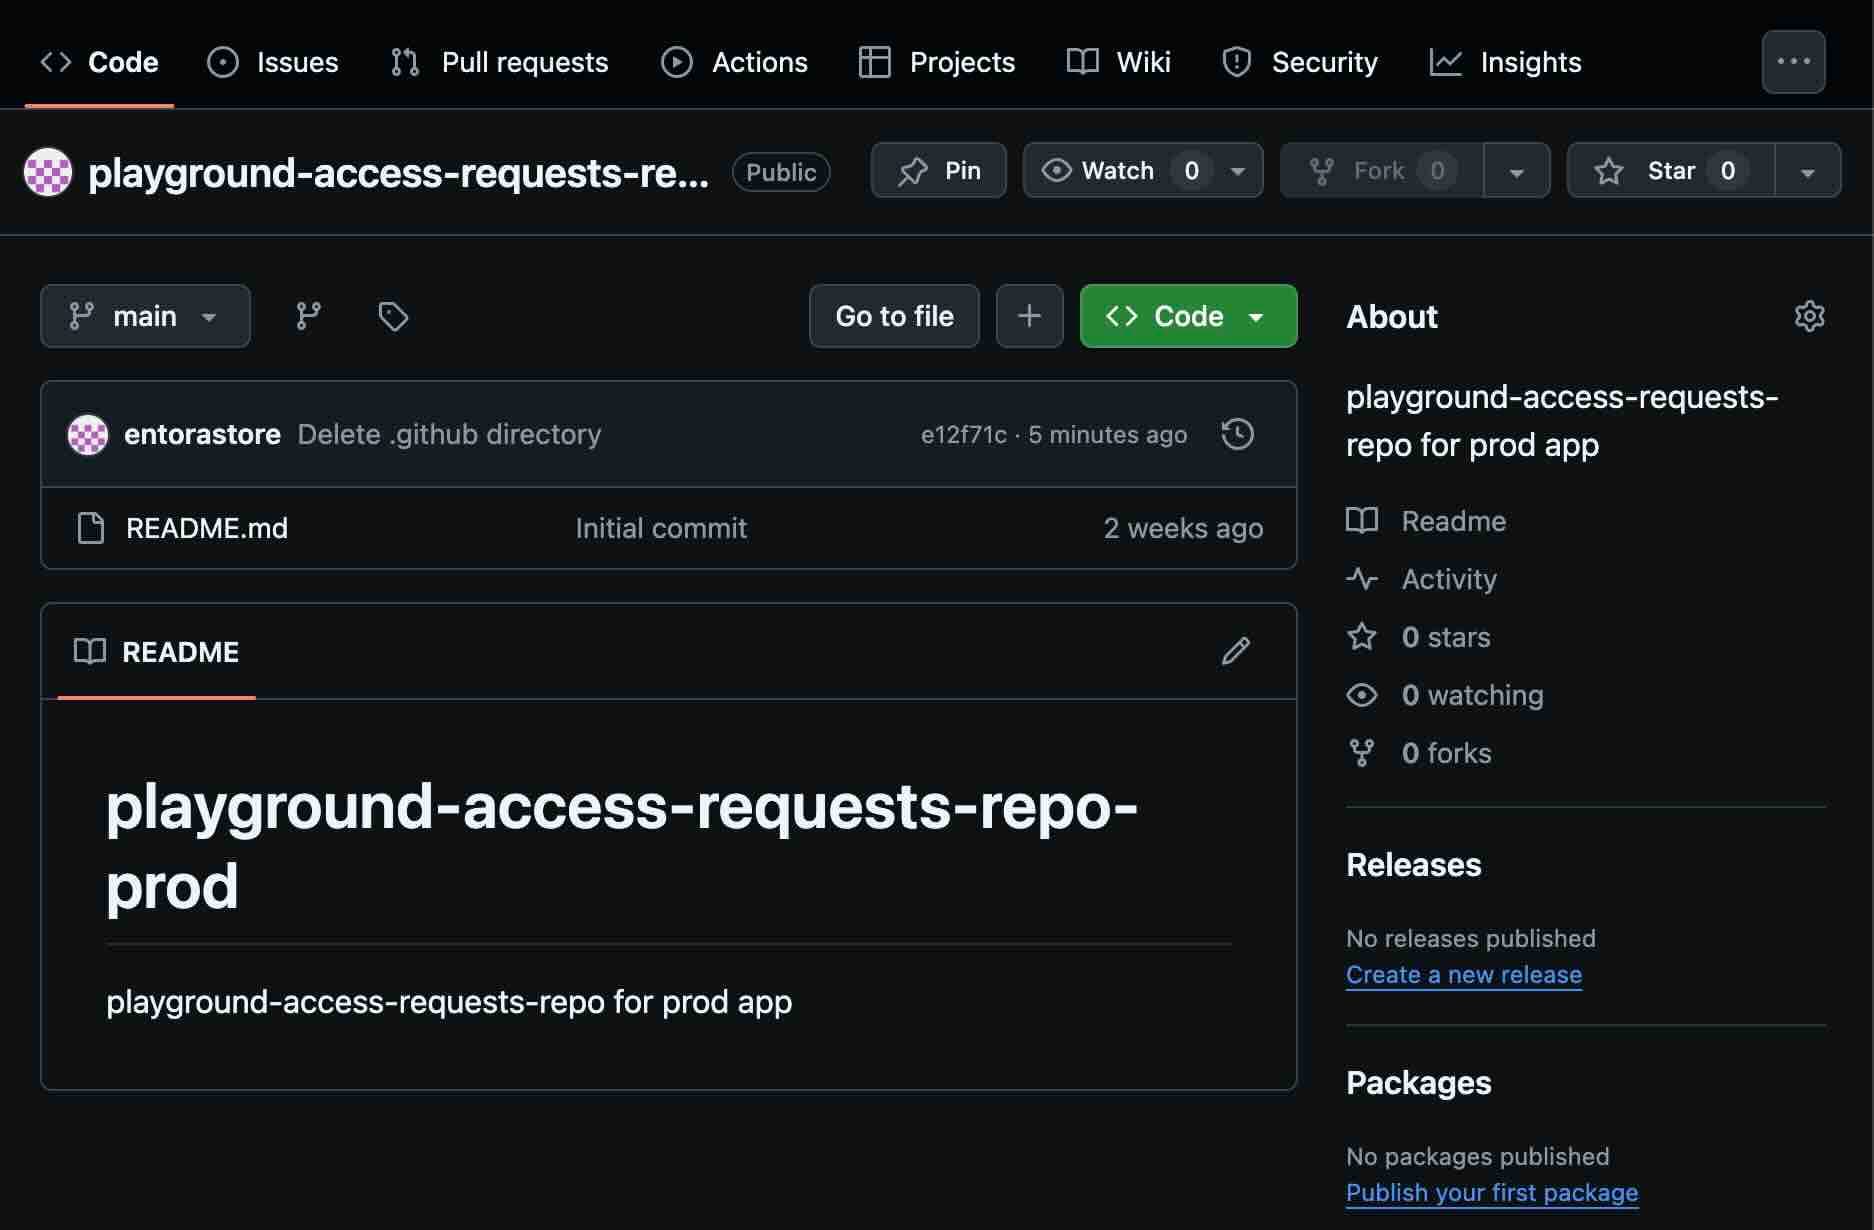
Access requests repo example in GitHub. - 2
Connect to GitHub
Follow our simple flow to install our GitHub app in your repositories. The app must be installed in your access requests repo and any private repo you wish to add entitlements for. Once installed, you'll be redirected back to creating a GitHub entitlement.
Important: You need to give Entora access to both the access requests repo and any private repos you want to sell access to. If you need to add access to additional repositories later, see the step below.
Connect GitHub on the integrations page.
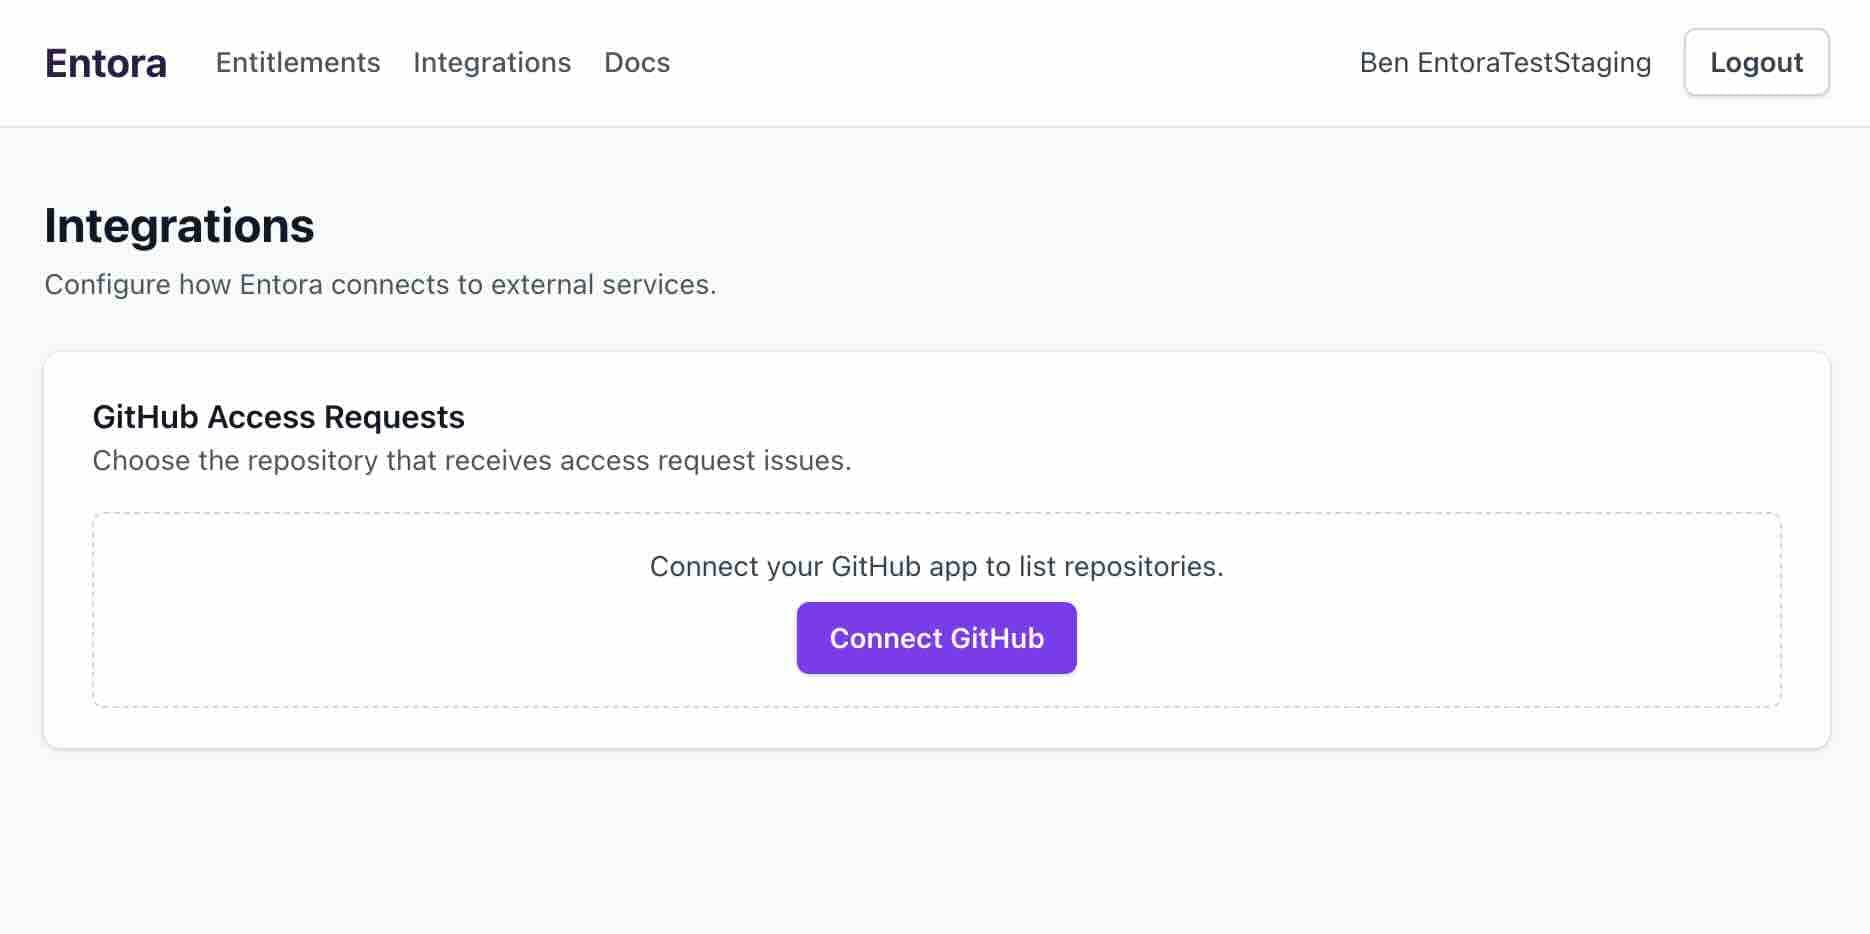
Connect your GitHub account from Integrations. - 3
Manage GitHub app repository access
If you need to grant Entora access to additional repositories (for example, if you didn't grant permission for the access requests repo initially, or if you have new private repos you want to add), you can update repository access permissions in GitHub:
- Go to github.com
- Navigate to Settings > Applications
- Click "Configure" on entora-entitlements-app
- Under Repository Access, select the repositories you want to grant access to
- 4
(Optional) Change your access requests repo
One access requests repo manages all private GitHub entitlements you will register. You can set it now, or wait to choose it until you create an entitlement. At any time, you may change which repo serves as your access requests repo on the integrations page.
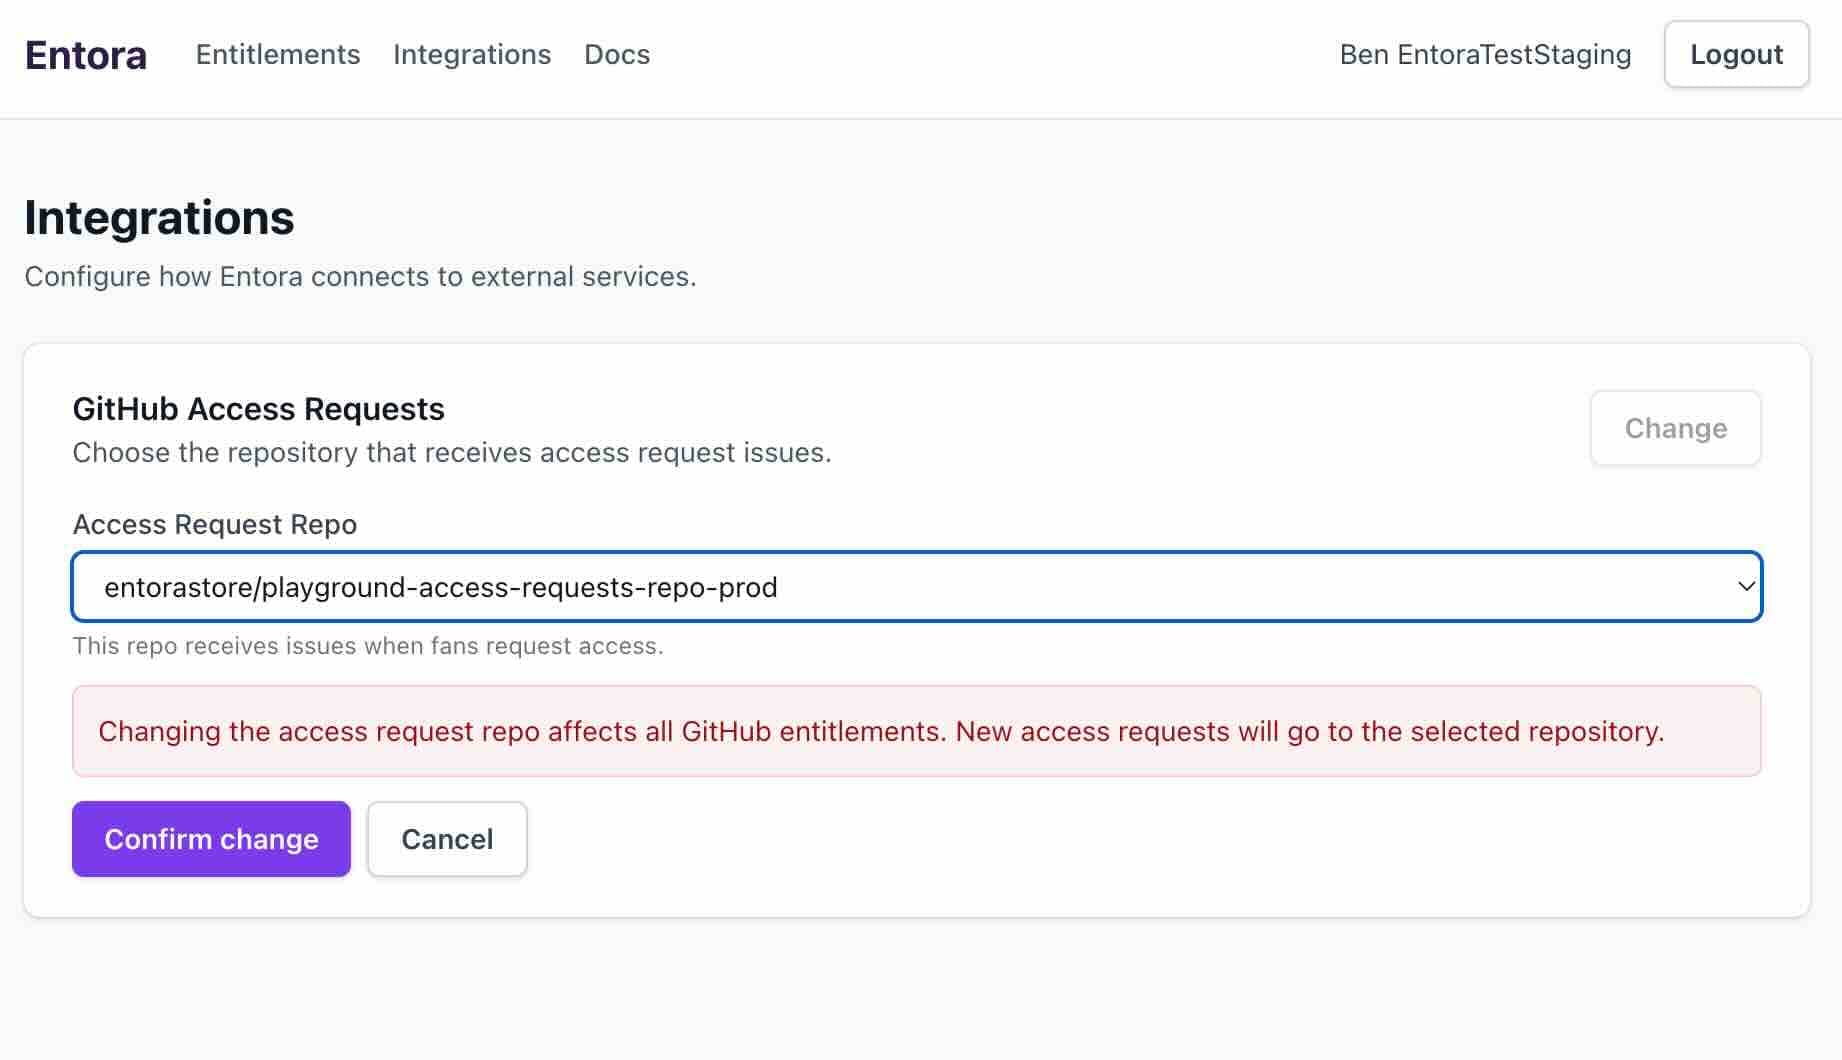
Update the access requests repo in Entora integrations settings.
Create a new entitlement#
Steps to create a new entitlement once setup is complete.
- 1
Create a new GitHub entitlement
Click the "New GitHub Entitlement" button on the entitlements page
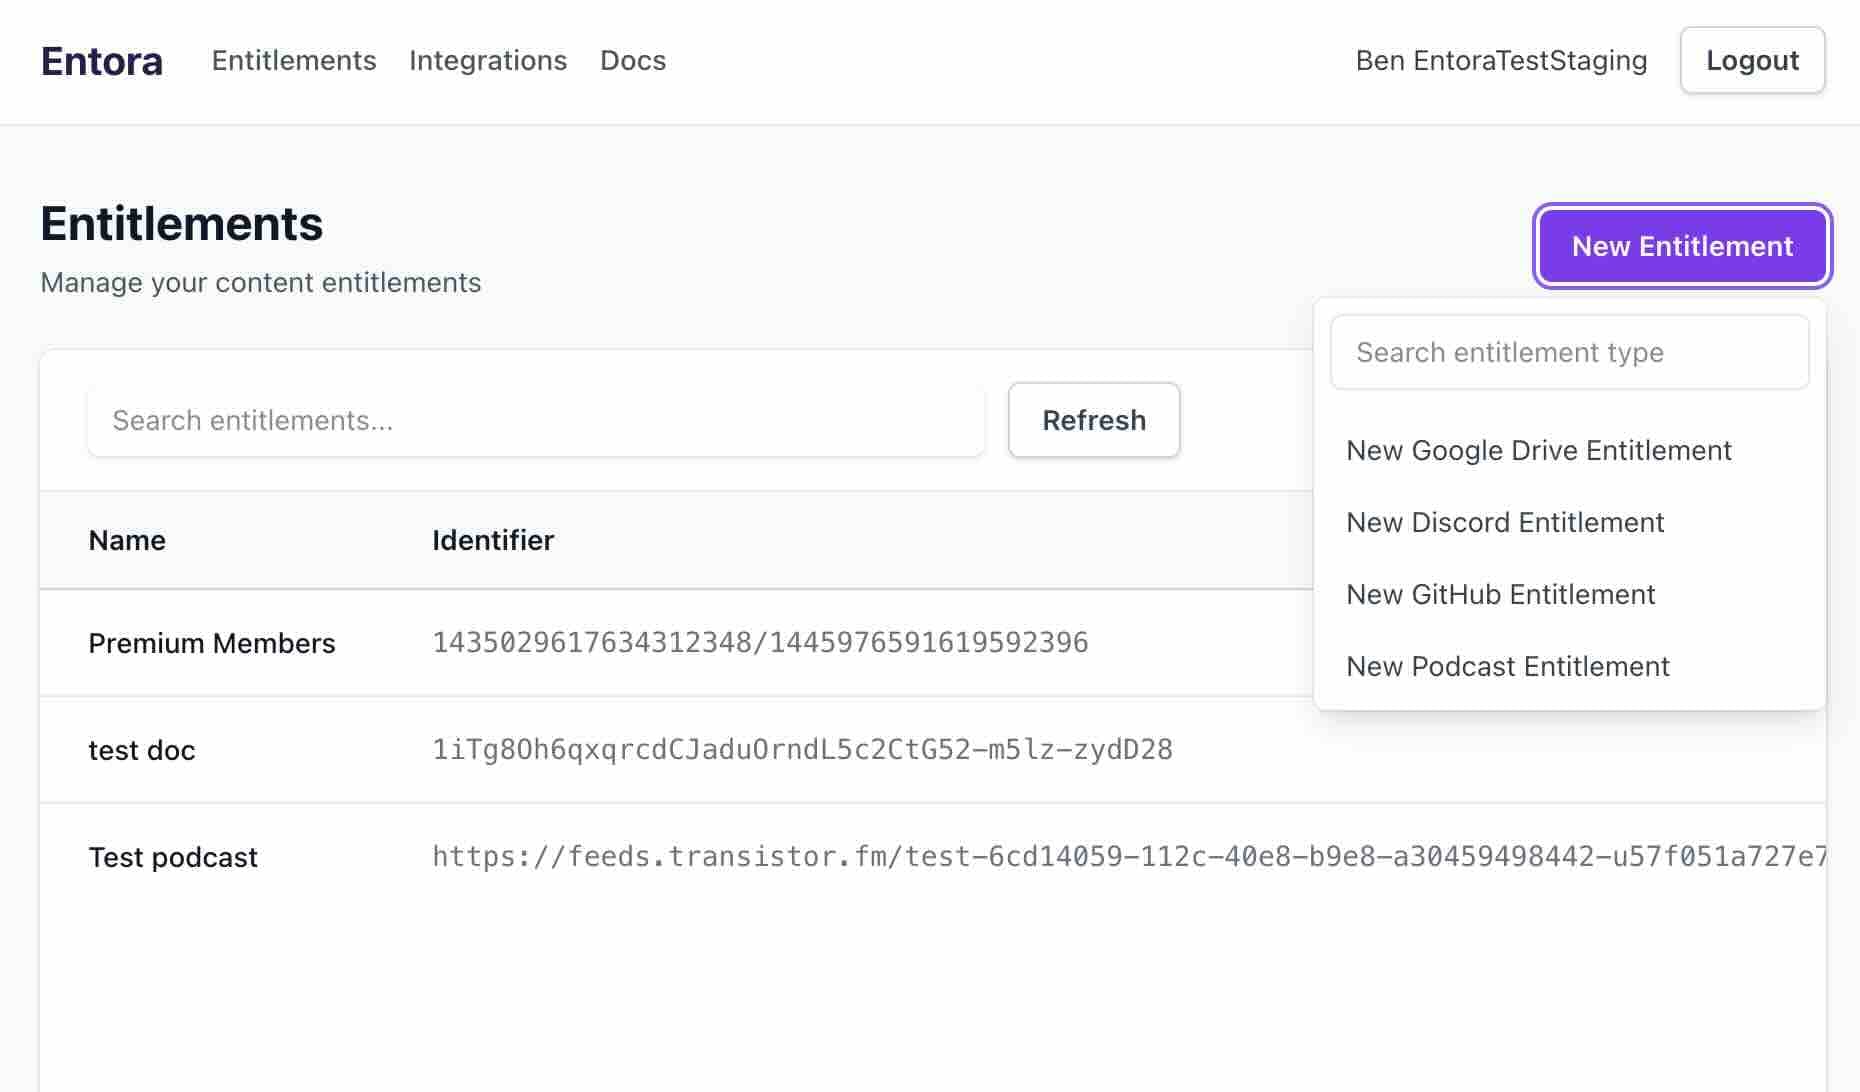
Start a GitHub entitlement from the Entitlements page. - 2
Enter entitlement details
Enter the entitlement details. If you have not already chosen your access requests repo, you must add it here. Choose your private repo to grant access to. Set a name for the entitlement, a price, access duration, and sale end date. Click "Create" to finish. You will be sent to the page for the entitlement.
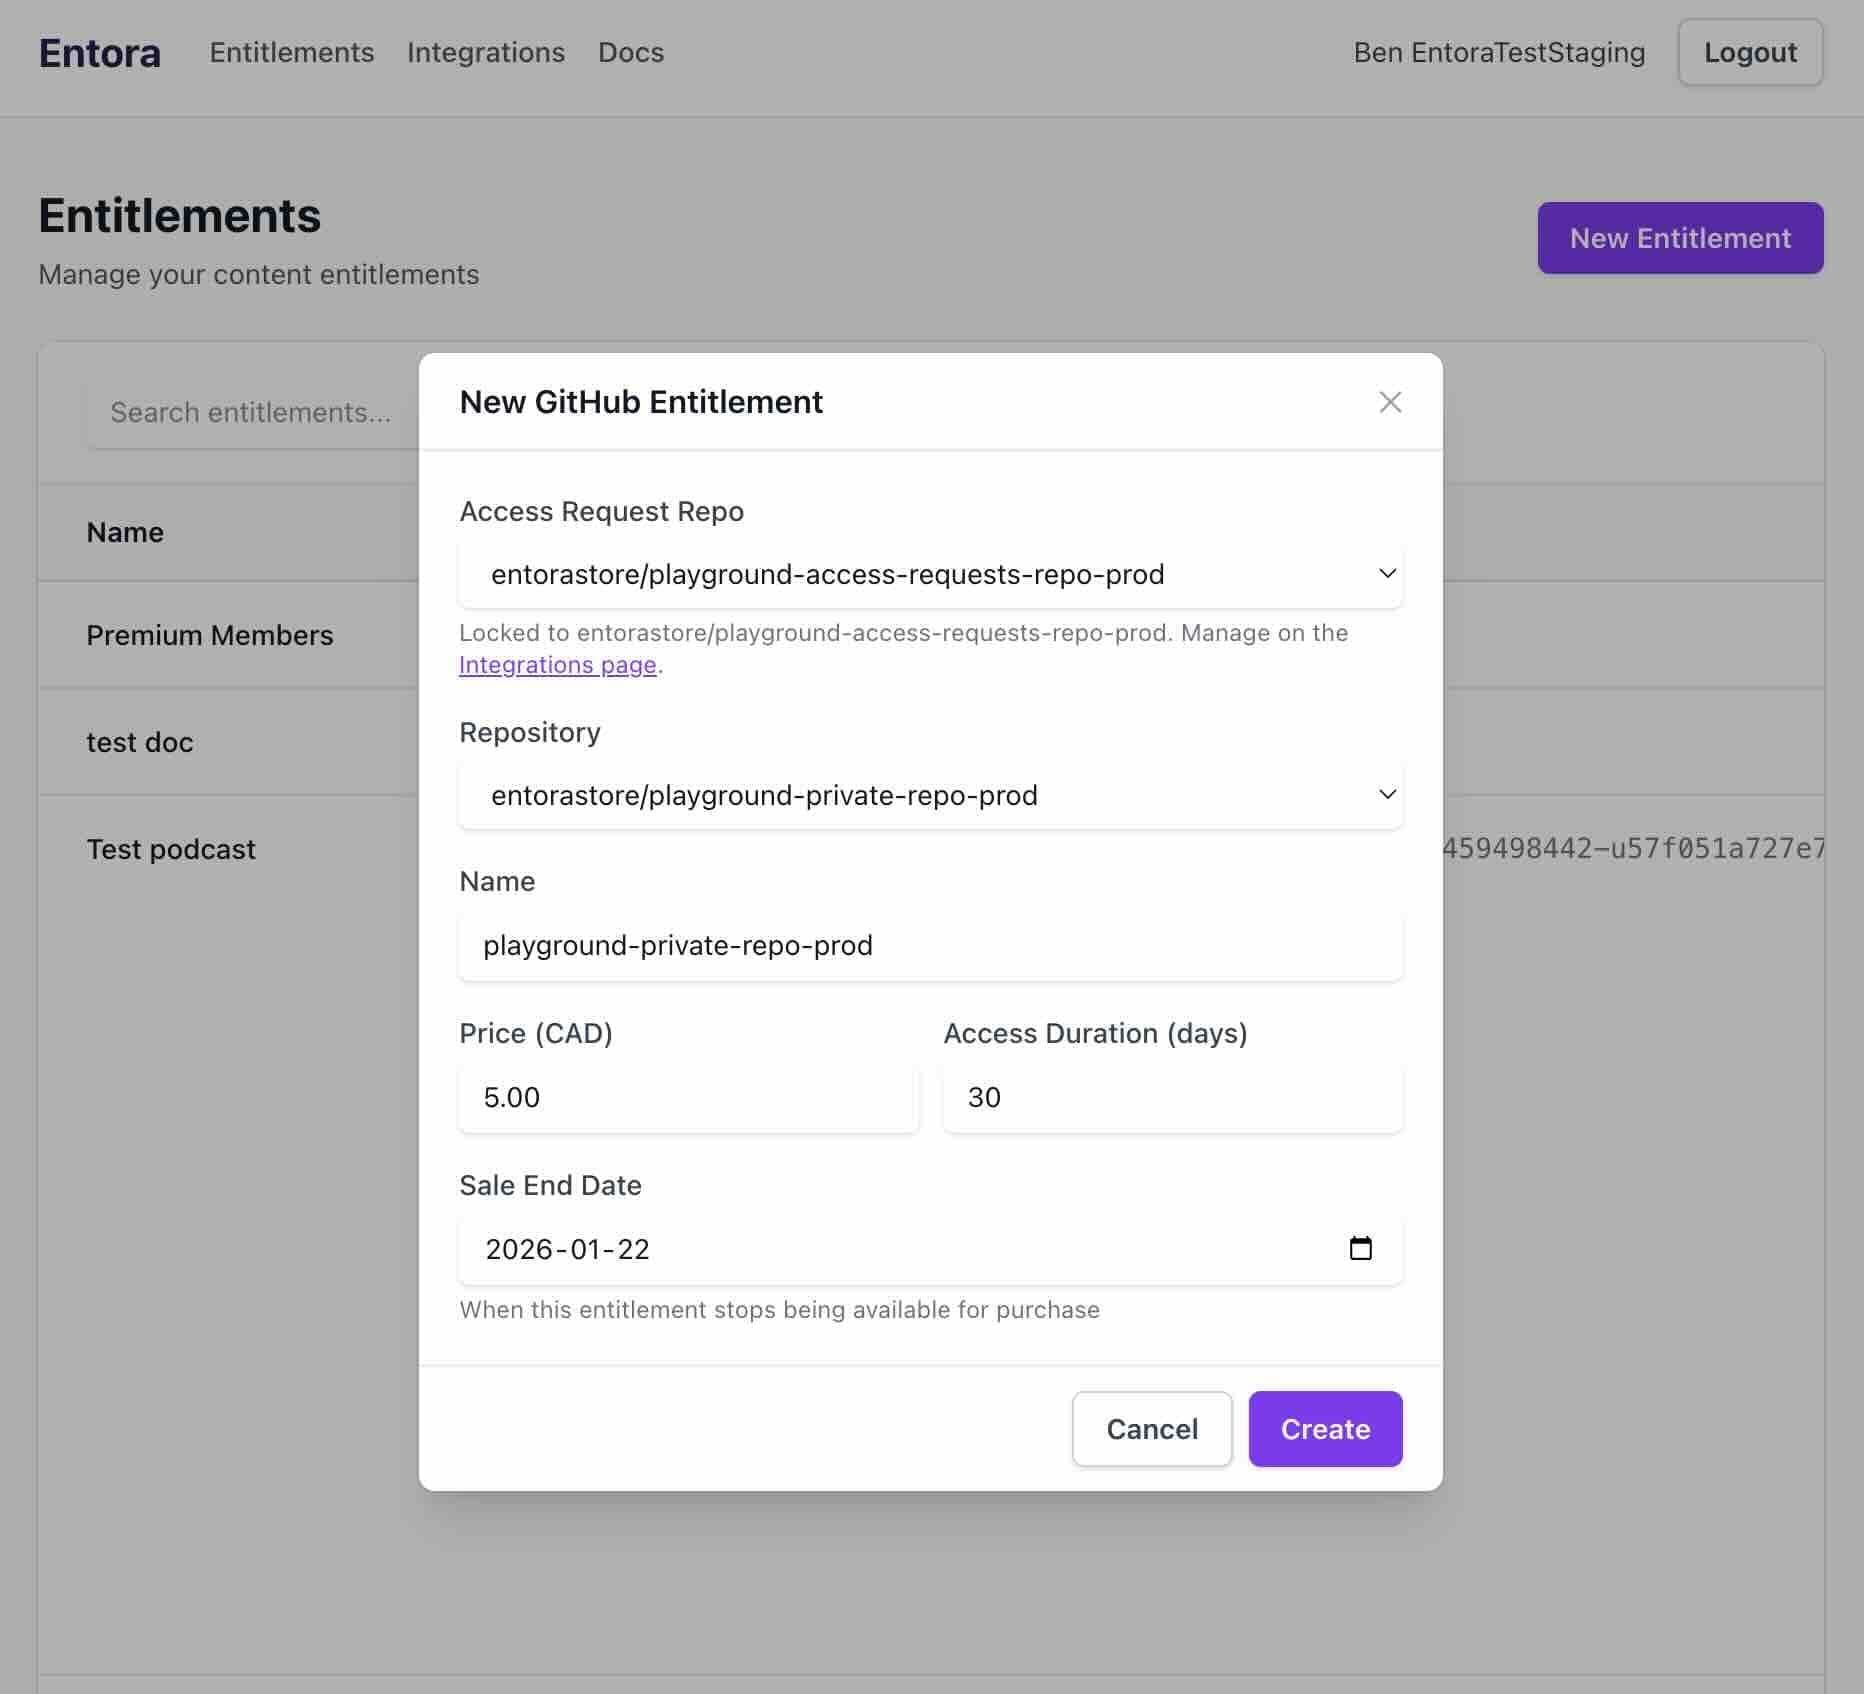
Fill in the GitHub entitlement details. - 3
Activate your entitlement
Your entitlement is deactivated by default. Click the Activate button to make it available for purchase.
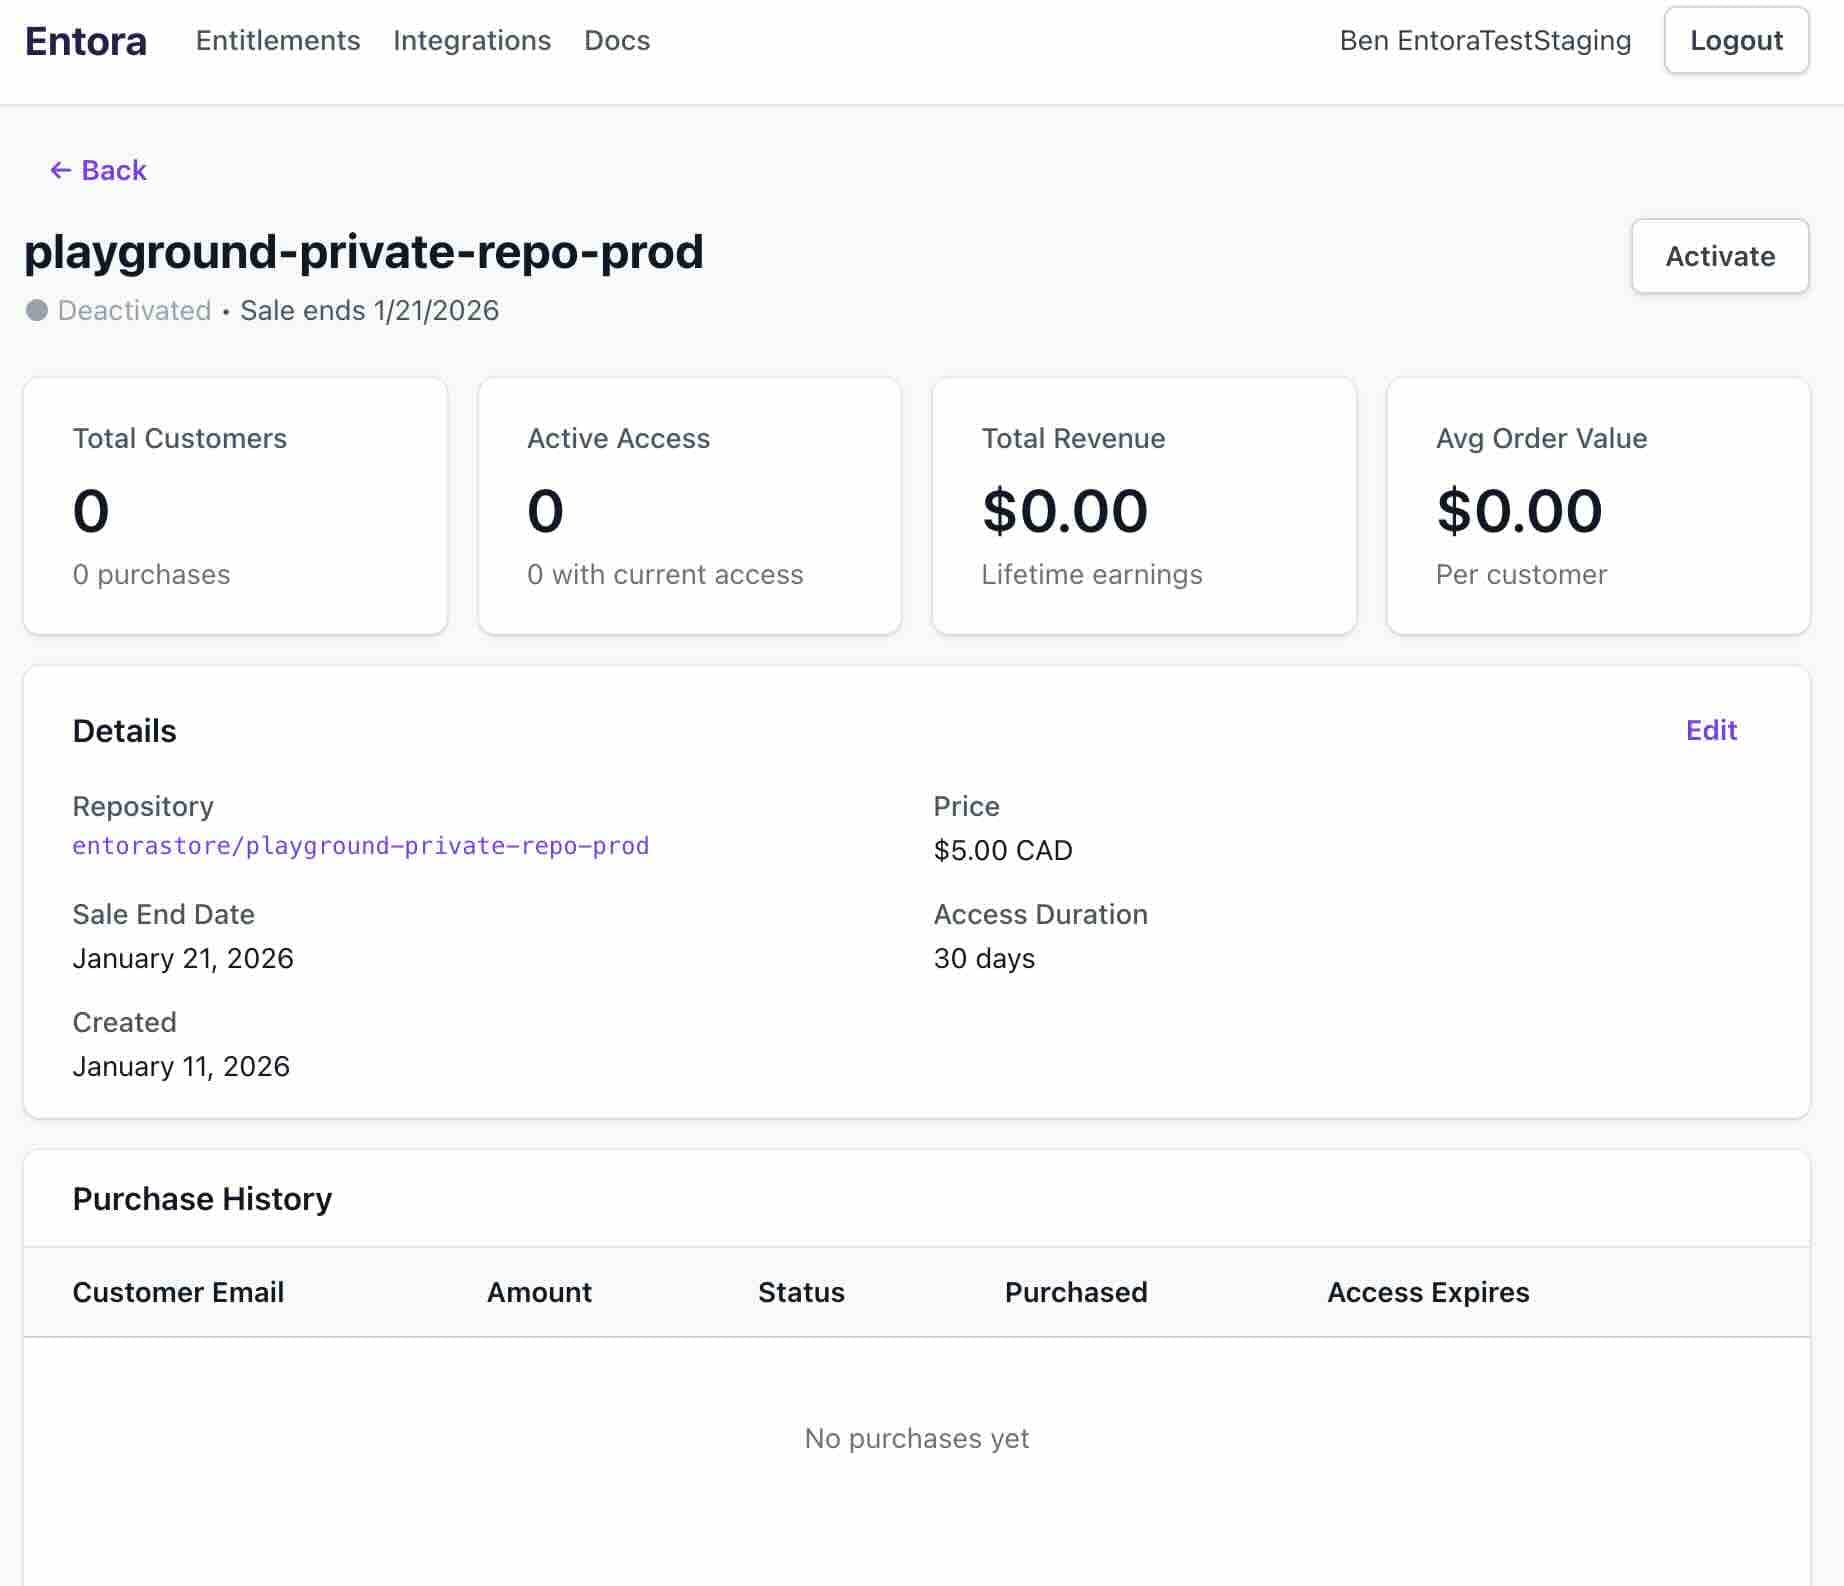
Deactivated state before going live. 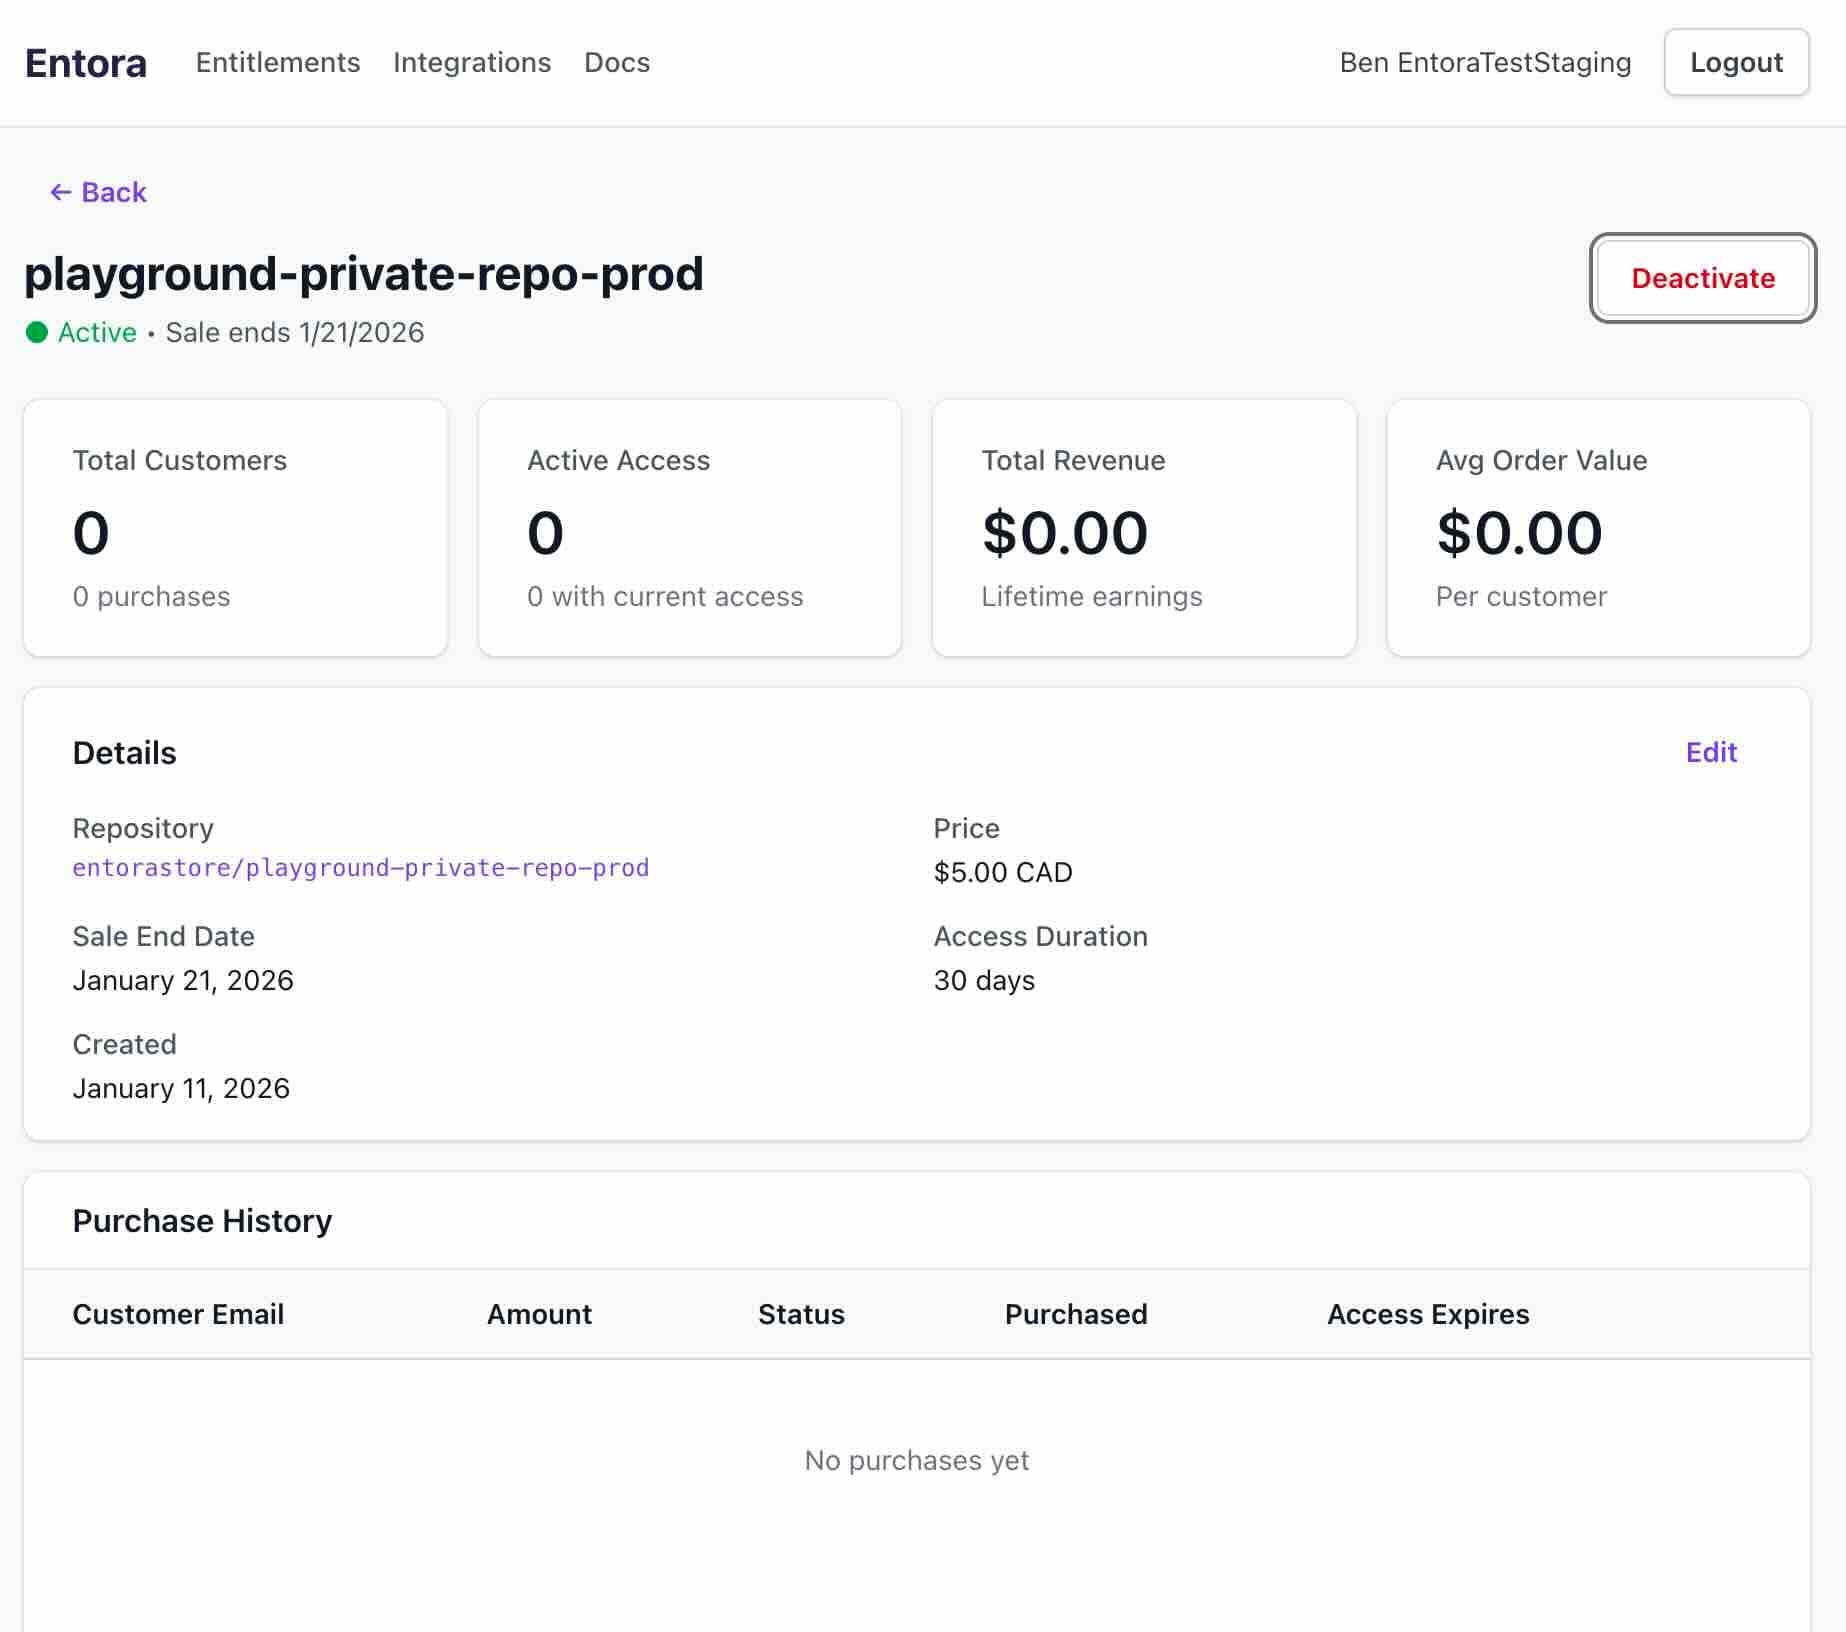
Activated state after toggling on. - 4
Send customers to the access requests repo
Customers can now request access to your private repo from the access requests repo as shown below. Our app automatically creates an issue template to make requests easy for customers to fill out.
Customer flow#
Steps that a customer takes to purchase your entitlement.
- 1
Create an access request issue
Visit the access requests repo and click "New Issue". Choose the appropriate issue template form for the desired entitlement. Optionally add your email to the form. Create the issue.
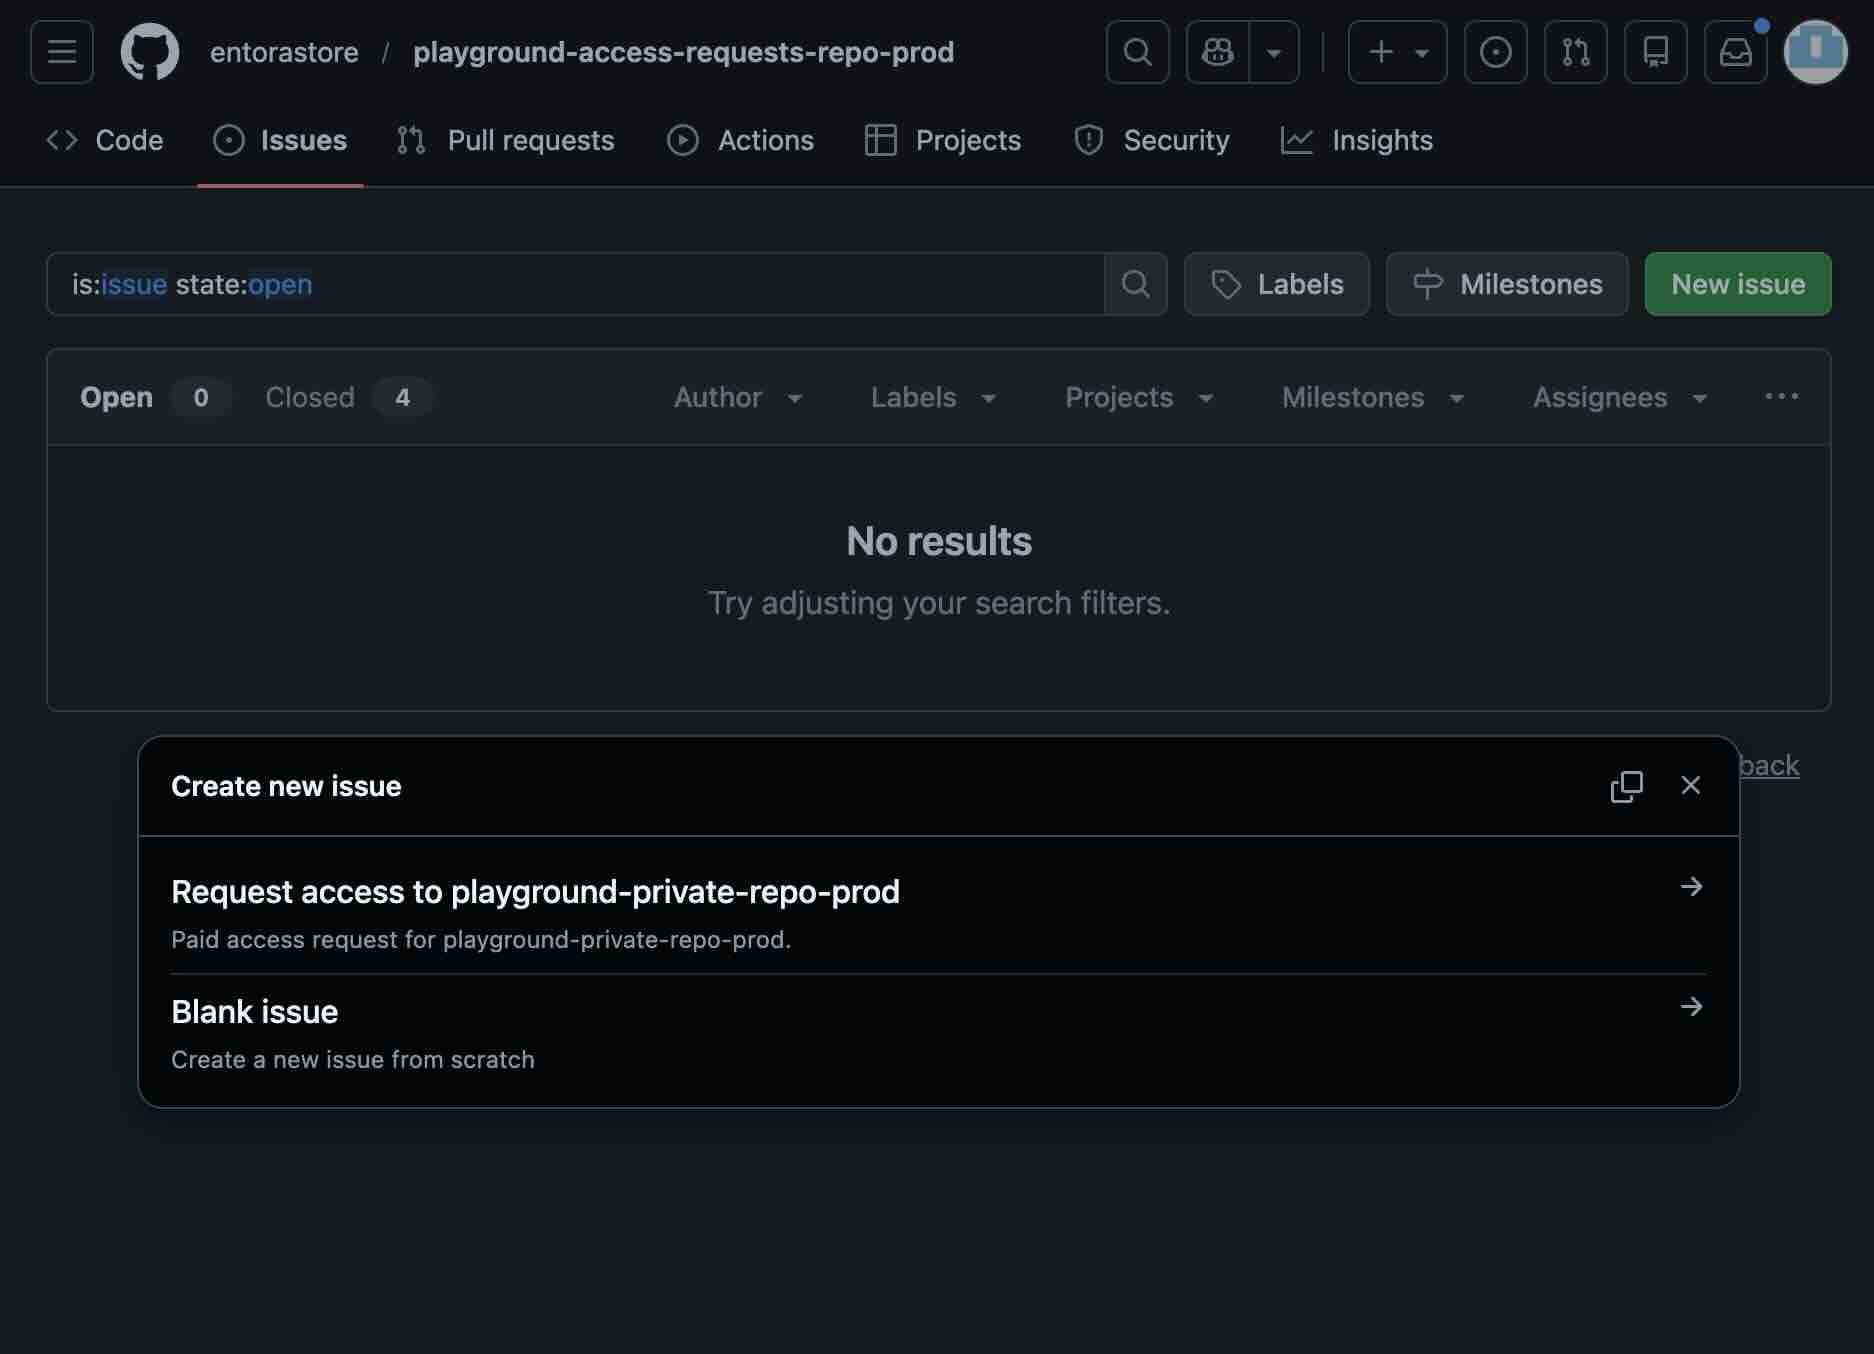
Customers click to start a new access request issue. 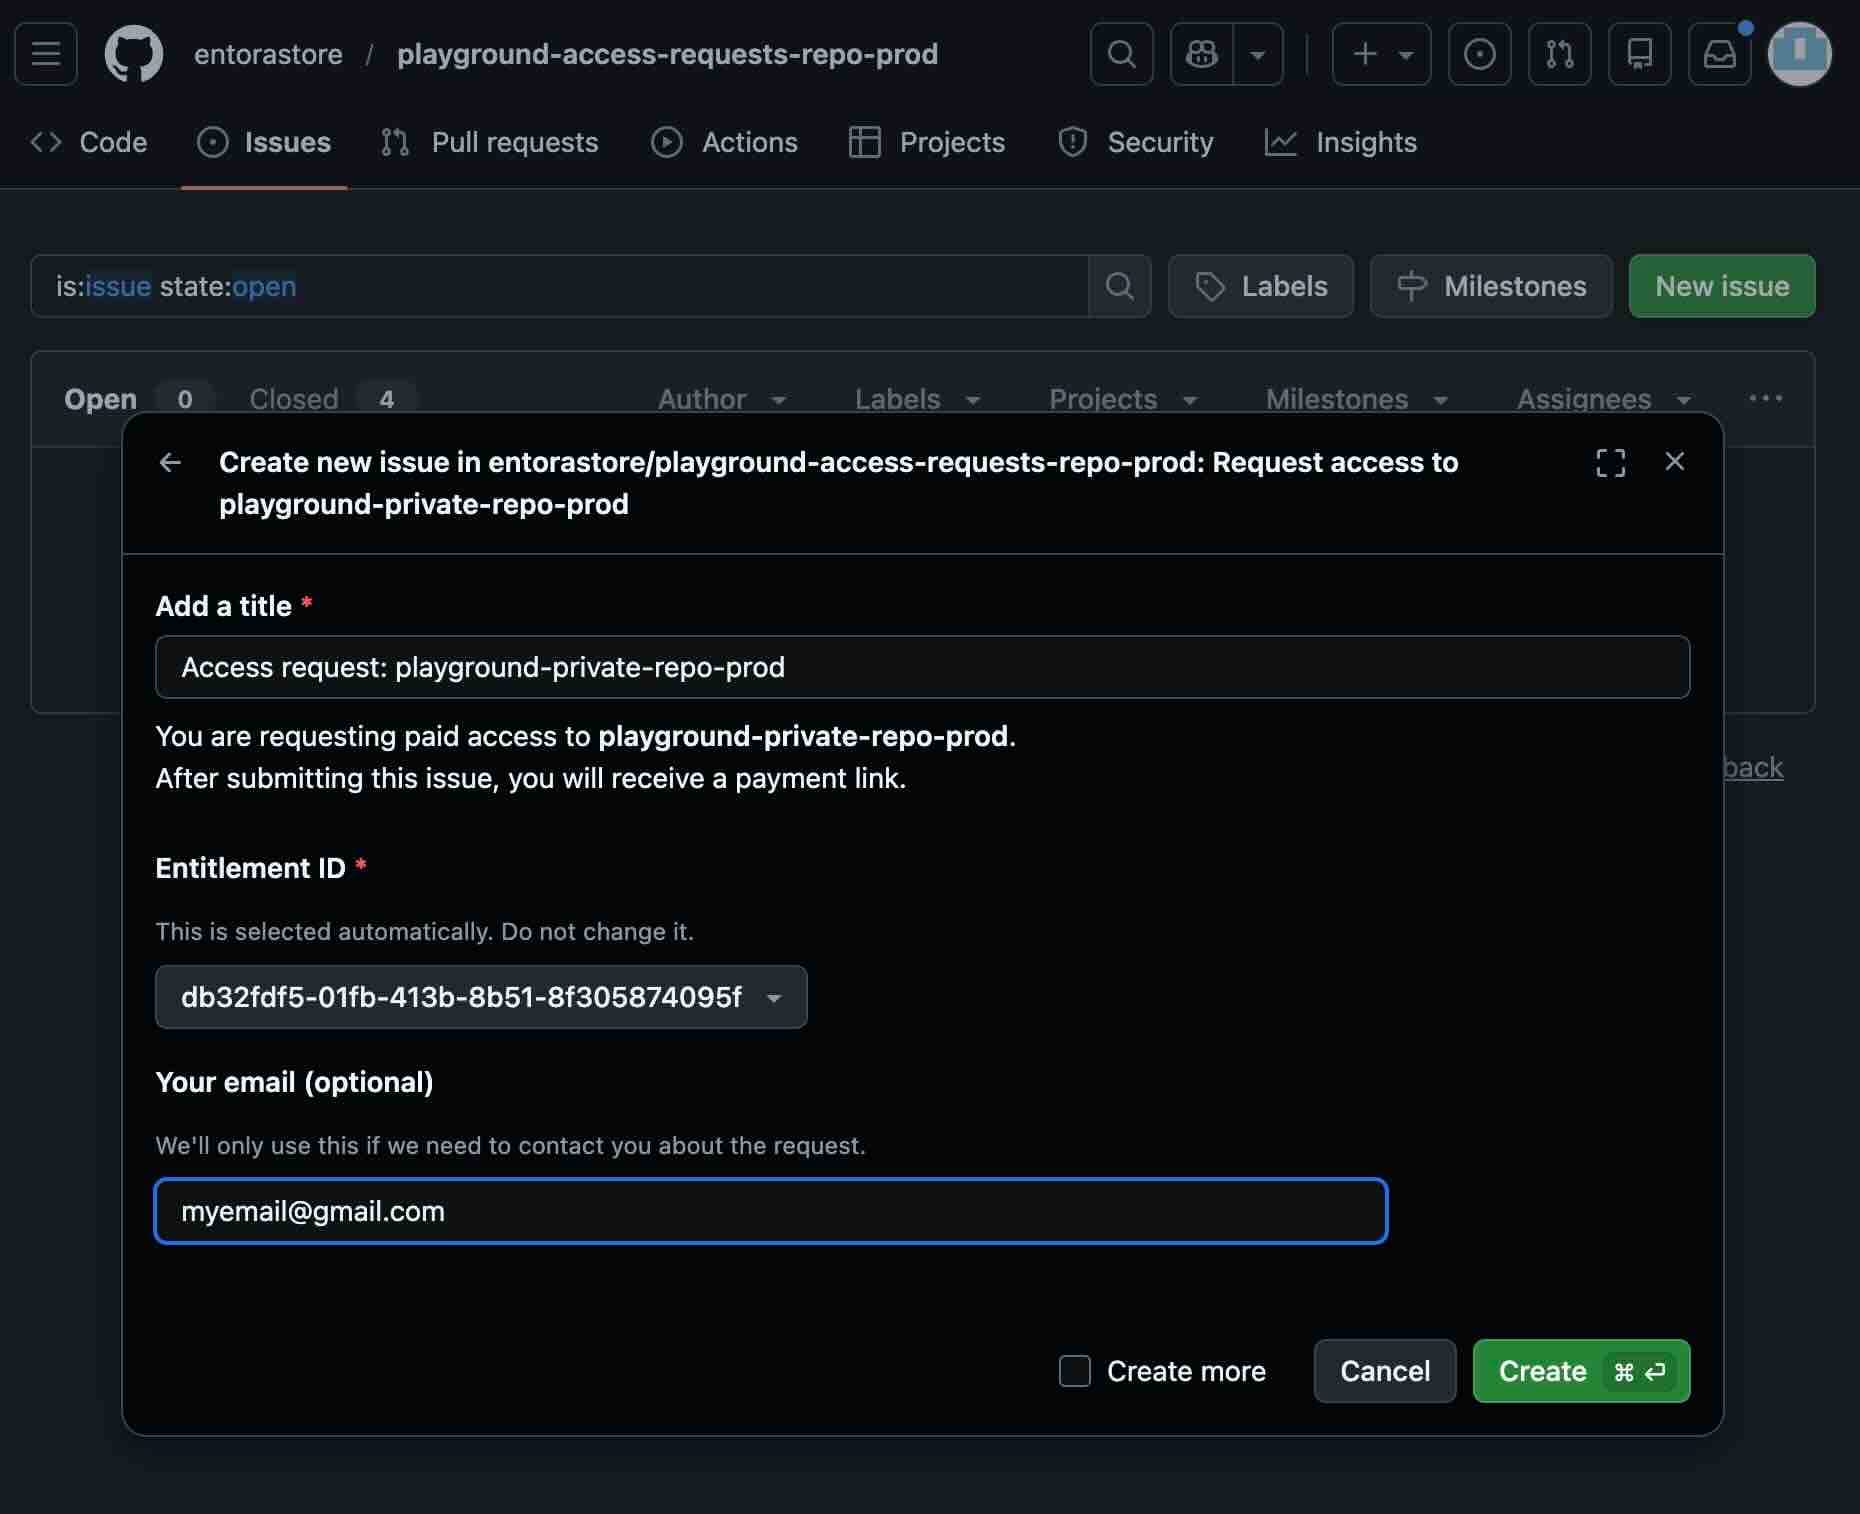
Customers submit the access request form. - 2
Proceed through payment
Proceed through the payment flow using the checkout session link given in the issue.
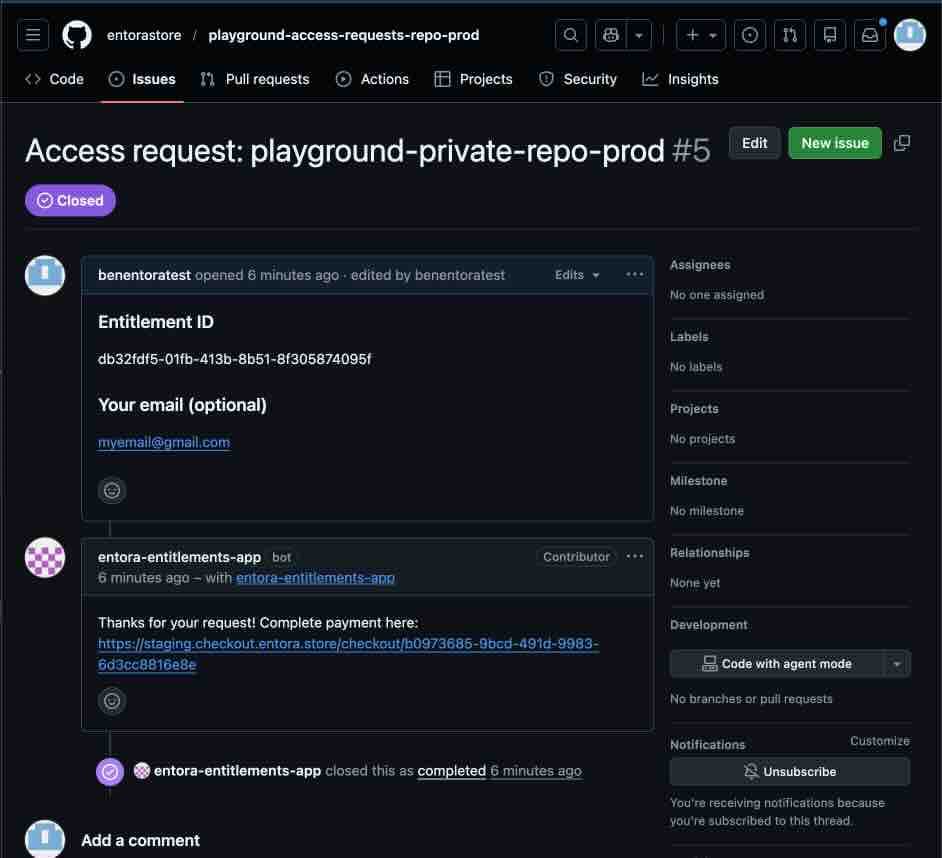
Customers complete the access request flow. - 3
Enjoy access
Accept the invitation to the repo and enjoy access!